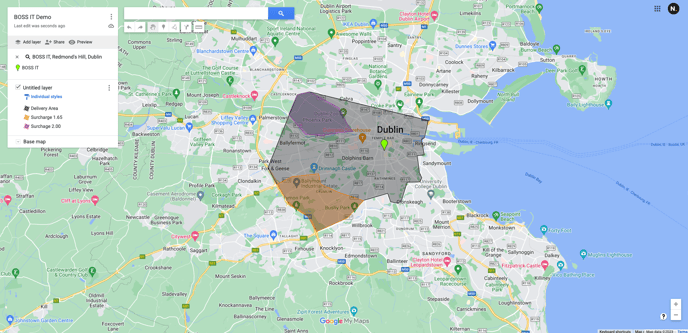
How to set up your delivery areas that the venue will deliver to as well as to price and surcharges.
The system uses polygons to determine areas that the venue will deliver to as well as to price deliveries.
We have two different entities that are represented by these polygons:
- Delivery area: Is used to specify the whole delivery area, i.e. outside of this deliveries will not be made by the venue. With this delivery area is it helpful to know the delivery fee.
- Surcharge area: Areas within your delivery area that have an additional charge, this additional charge will be added on to your base delivery fee specified with your delivery area.
In order to easily create these polygons we recommend using is google my maps
1. Create a new map:

2. Drop a pin by searching the location, this is simply to visually make it easier.

3. Press the following icon to start drawing your delivery area

- Click the "Add line or shape" from dropdown
4. Rename Delivery Area(s) using the highlighted button

- It is essential to rename shape layers before export to ensure correct surcharges are applied.
- Example layer names:
- Delivery Area €1.00
- Surcharge €1.65
- Surcharge €2.00
- Example layer names:
5. Similarly, draw more polygons for any areas that would have an additional charge.
6. On completion of drawing, export one CSV with all areas and upload into your BOSS IT onboarding portal

EXAMPLE Areas:
The delivery area for this venue is the following:

Within the below orange area we also have an added surcharge zone which has an extra charge amount of €1.49
i.e. it will cost €1.49 more for a delivery in that area.

Within this purple area we also have a third surcharge zone below which has an extra charge amount of €2.00
i.e. it will cost €2.00 more for a delivery in that area.


