
Lets have a look at the BOSS IT Driver App and some of its core functionality.
Why?
The driver app exists for drivers to interact with orders throughout the order lifecycle. Without the driver app there is no ability to track drivers as the location of the drivers is sent through the driver app. Additionally the driver interacts with orders in a way that the customer can see, so for example they will start deliveries, notify customers that they have arrived as well as completed deliveries from the app.
What happens if the driver closes the app?
The driver app works in the background as long as the app is not closed out of multitasking.
Multitasking is when you swipe the app up and close it.
Logging In
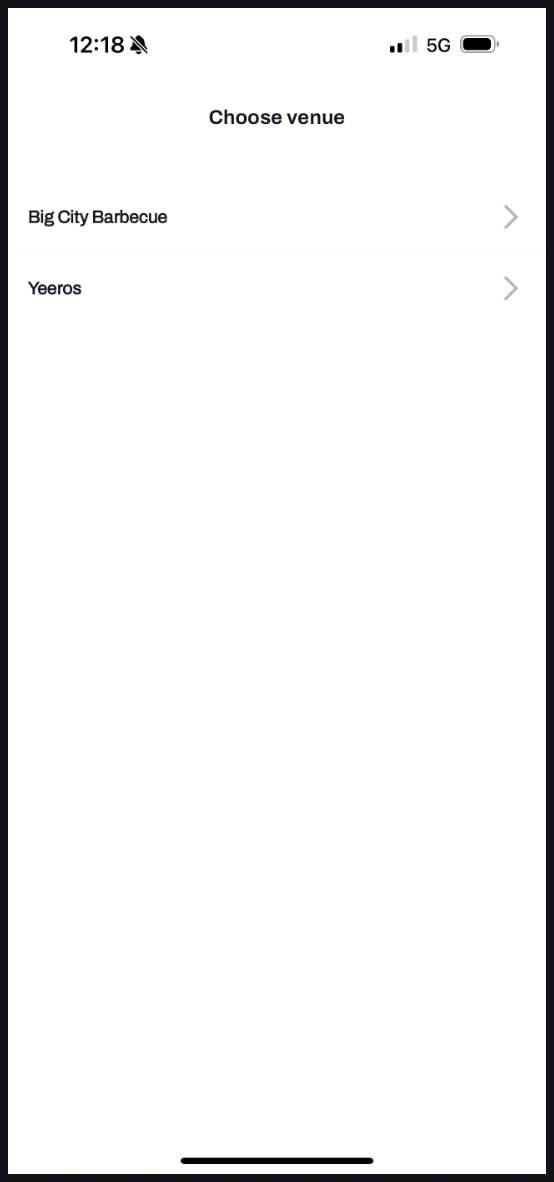
The below will be the default screen that is visible when logging into the driver app. In order to log into the driver app the user must be added to a venue with the role driver. The PIN they must use is their personal pin not the venue based pin to login.

After a successful login, the user must then select which venue they will work at for that specific shift.
List View
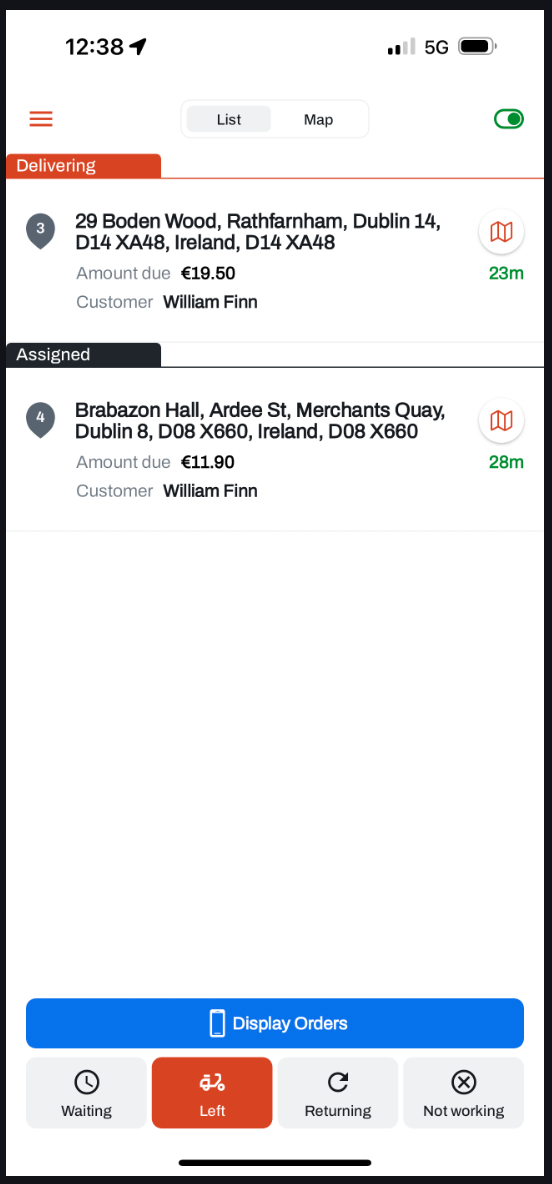
On the list view you can see the current orders and interact with them. All of the interactions are described in the “Order lifecycle section” below.
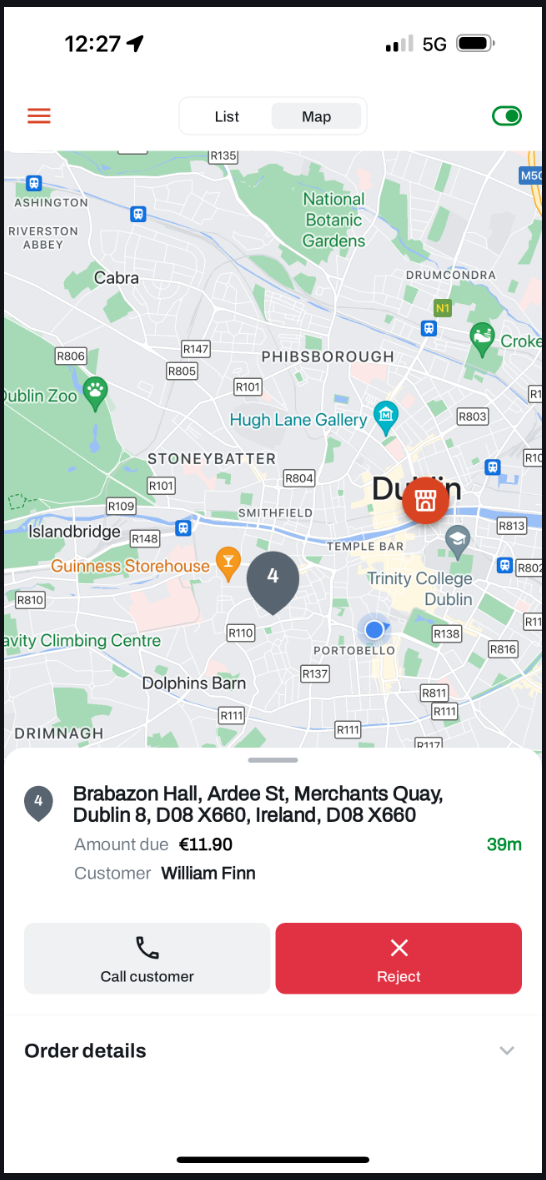
Map View
On the map view you can see the location of the orders, location of the driver as well as the venue.
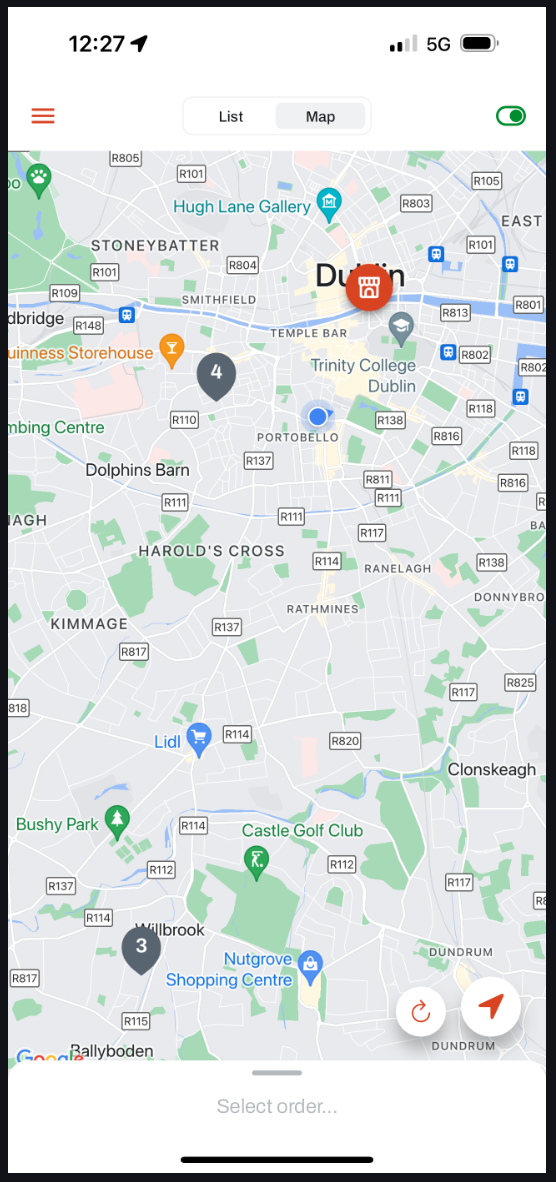
In this case the red circle is the venue, blue pin is location and grey pins are the orders.
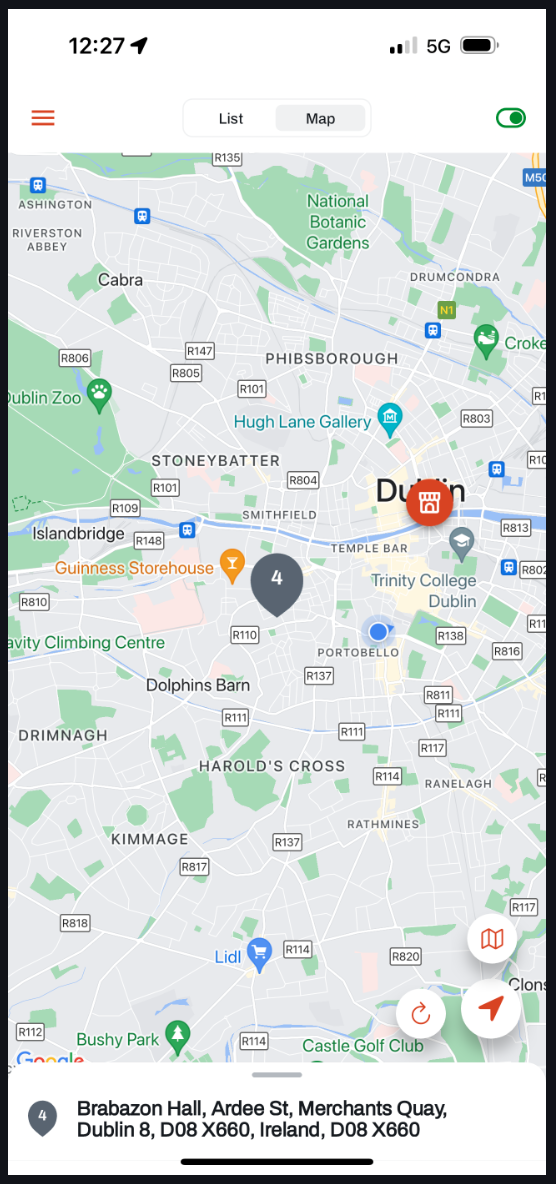
You have the ability to tap on an order and a bottom sheet comes up with the address, you can subsequently pull up on the bottom sheet to interact with the order as well as view additional details on the order.
Order lifecycle
Below is a chart of the order status lifecycle for orders.

-
Assigned: when an order is assigned to a driver it automatically goes into this status.
-
Left venue: an order goes into this status when the driver leaves with the order.
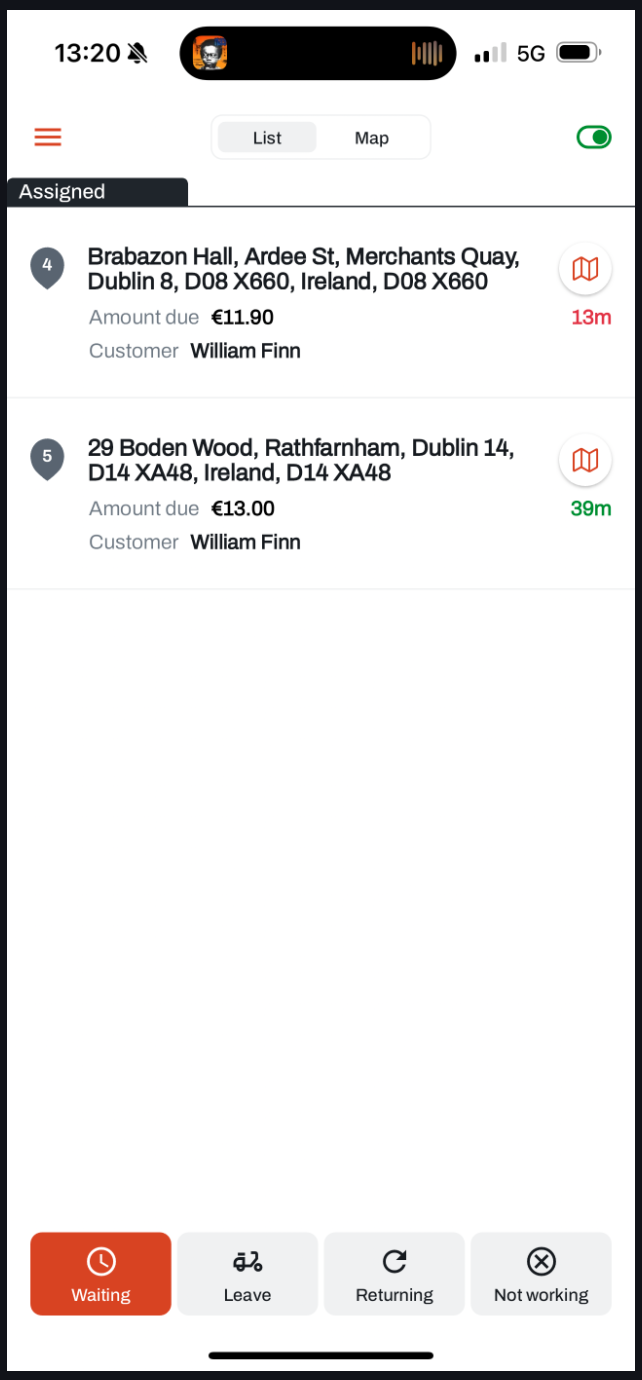
When a driver has some assigned orders they can press the “Leave” button on the bottom left. If there is one order assigned the order will automatically leave without any configuration, if there is more than one order then the driver will see the following screen:
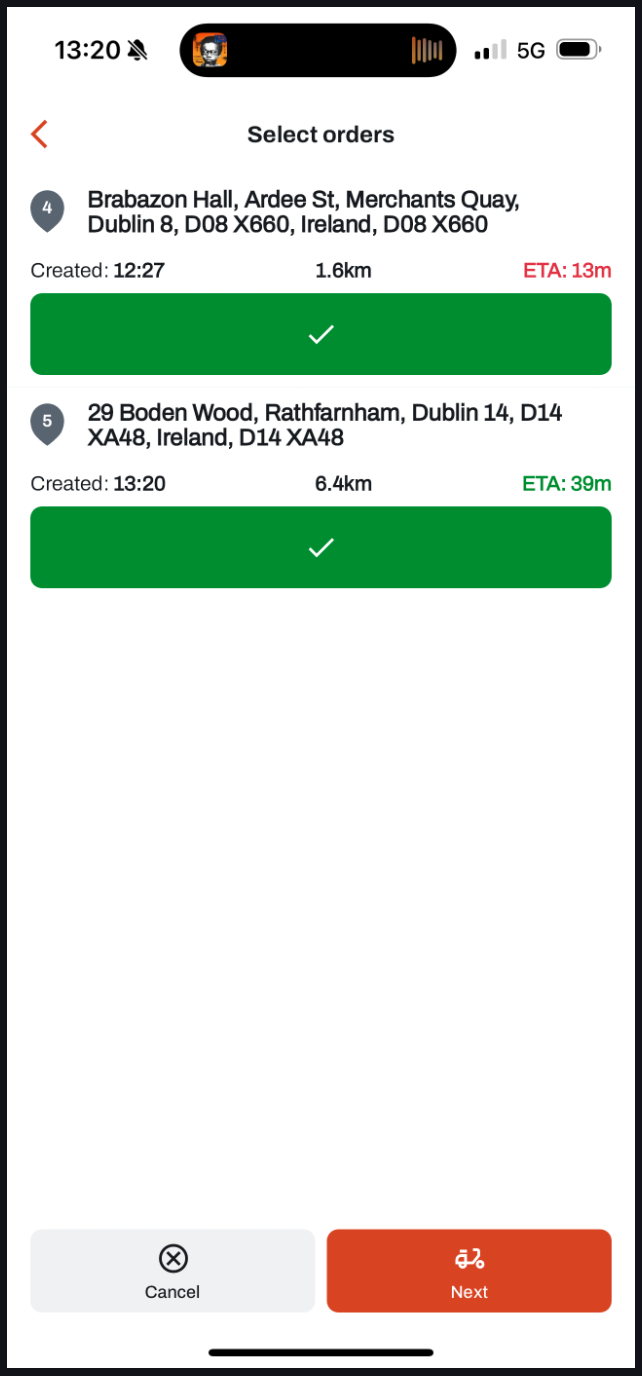
On this screen the driver can choose which orders to leave the venue with, i.e. they can only leave with specific orders. They see the distance as well as the time in relation to eta, if the time stamp is green then the eta has not been reached yet for example above for order 5 there is 39 minutes until the eta. If the timestamp is red then the current time is past the eta, for example order 4 above is 13 minutes past the eta so the order is already late.
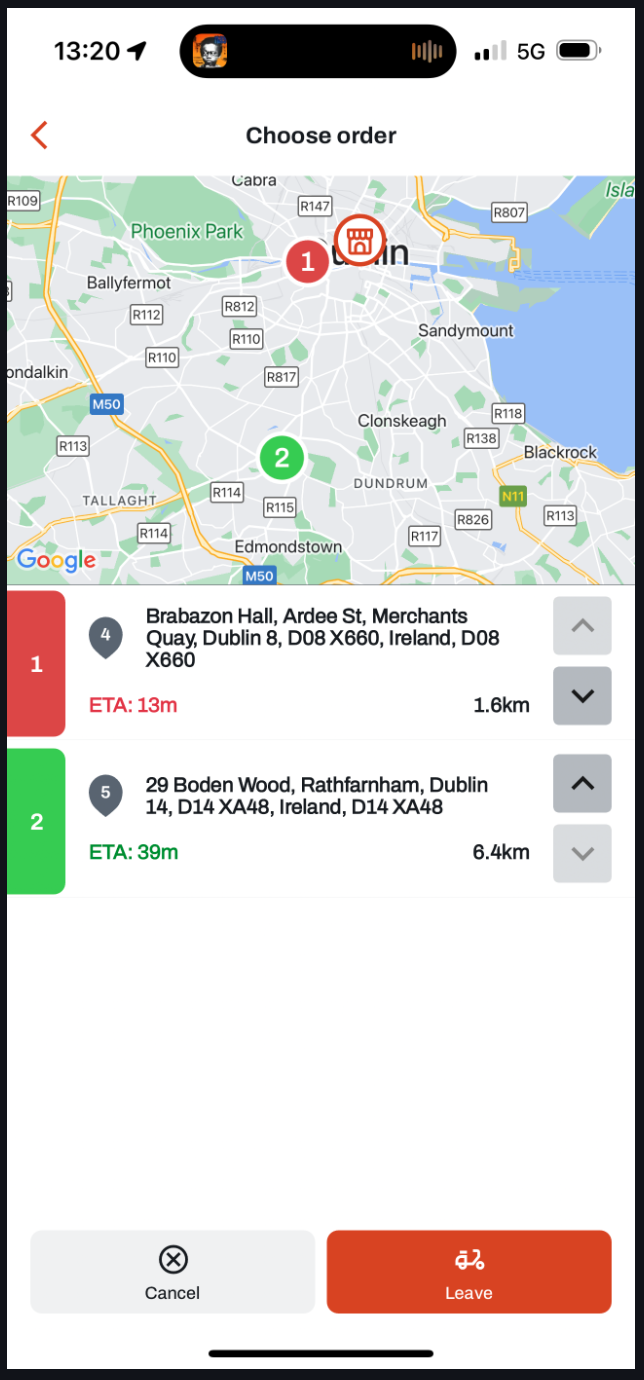
Subsequently the driver can choose the order in which the orders are going to be delivered, by default it is sorted by the most urgent i.e. the least time remaining until the ETA. The drivers can see the order locations on the map and also make a decision to deliver another order first because it is on the way.
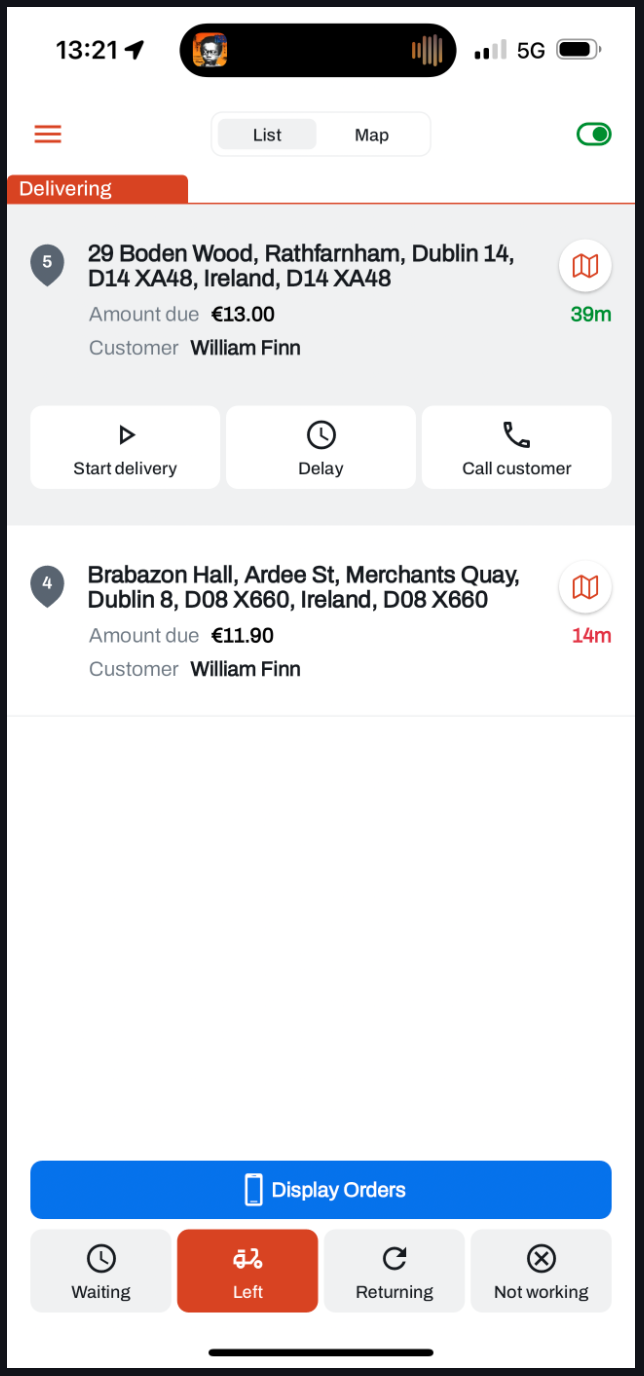
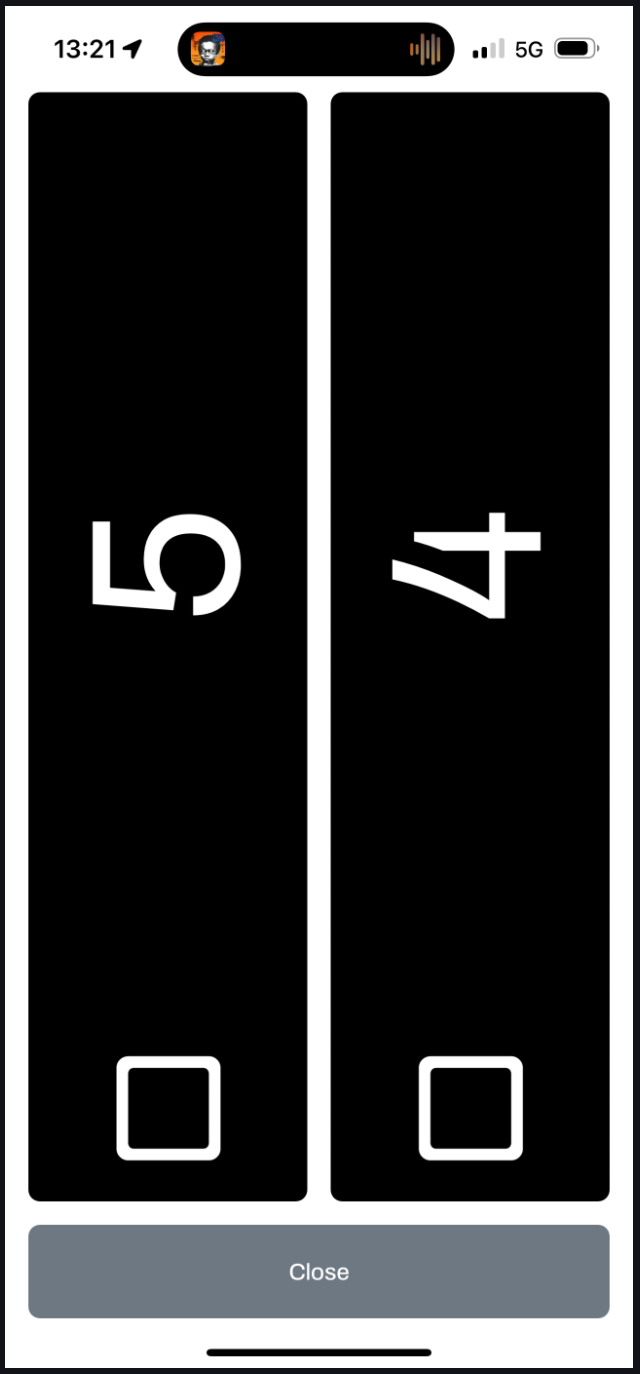
Once the driver has pressed “Leave” the bottom button is automatically on “Left” and there is a new tab of orders on the list screen with the red title “Delivering” these are all of the orders that the driver is currently delivering. There is also a “Display Orders” button which is a big display screen of orders that the driver is leaving with, this is done so that the driver can show members of staff in the venue what orders he/she wants to leave with.
-
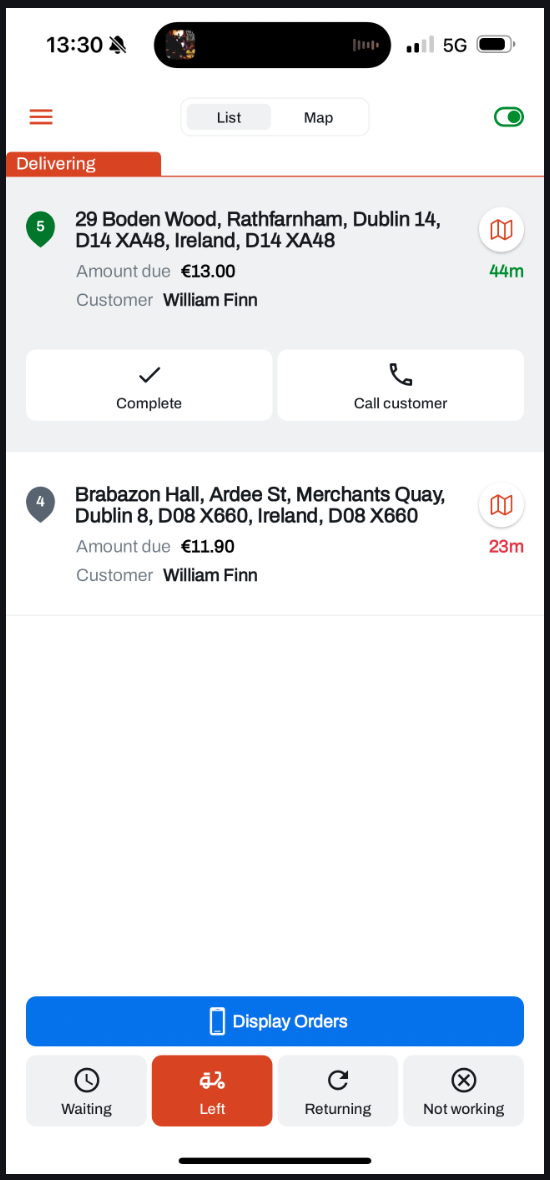
Started delivery: Once the driver has left with orders the first order in the list of orders will automatically move to “Start Delivery”. This will trigger driver tracking for the end user if customer driver tracking is enabled.

Once the driver has pressed started delivery the button “Arrived” will be visible.
-
Arrived to customer: when the driver presses “Arrived” the order goes into status “Arrived to customer” this sends a push notification to the customer that the driver has arrived.
-
Completed delivery: Once the driver presses the “Complete” button the whole order moves into status “Delivered” the customer can no longer see the driver tracking for that order. If there is another order to deliver, pressing “Complete” on one order will automatically trigged “Start delivery” on the next order in the delivery leg. Once the driver has completed the last order in the leg the driver status automatically switches to “Returning”.
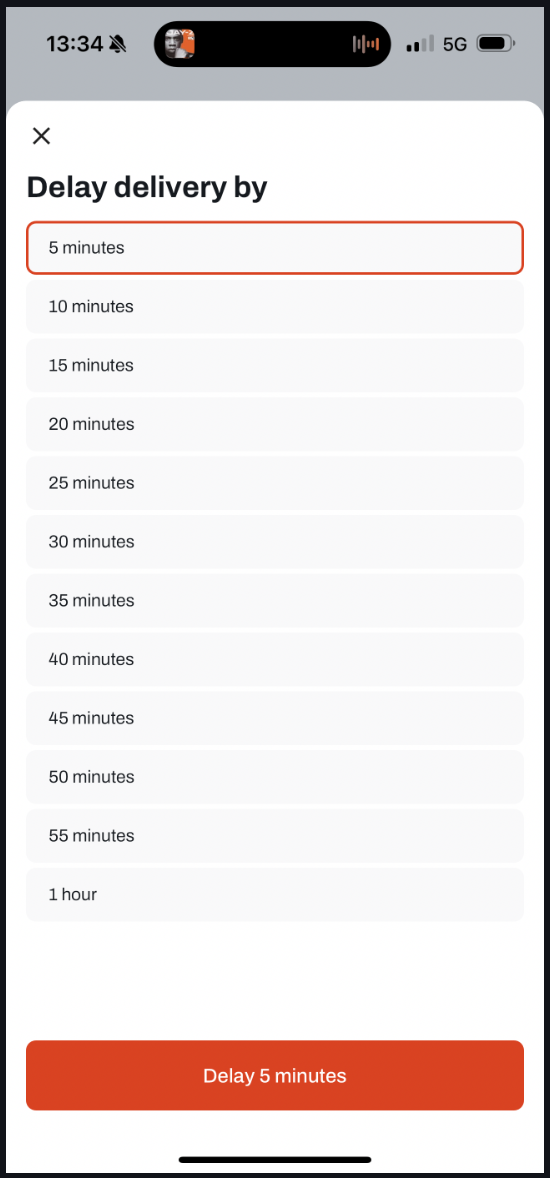
Delaying an order
A driver has the ability to delay an order, this means that the ETA that the customer can see is changed to a later value.
Driver lifecycle
The driver has 4 different statuses:
Waiting in venue: Waiting in venue is a “check in”. Additional information on how to set up check in can be found here. To summarise the driver can only press “Waiting in venue” once within a specified time interval, additionally they can only press this button within a certain distance to the venue. Importantly the driver can not be waiting in venue if they have currently active orders that they are delivering.
Left: the left venue status is automatically triggered when the driver goes through the flow of leaving the venue with orders.
Returning: Once the driver has completed all of the orders that they have left with the status automatically changes to returning to venue.
Not working: If the driver has completed their shift they can choose not working and they will no longer be available to be assigned orders.
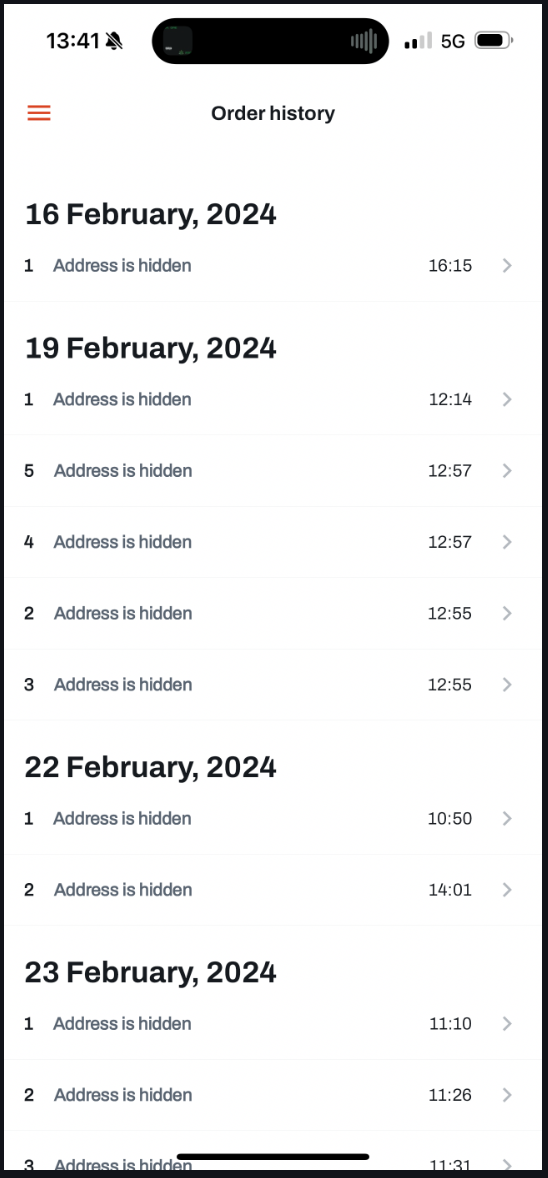
Order history
The driver is able to see a list of orders that they have delivered in the past. For privacy reasons if an order is older than 2 days the driver can no longer see the address of the order that they delivered.
Cash out history
A driver can see the cash out history in the cash out history tab. More details on how cash outs work is in the driver compensation doc.
